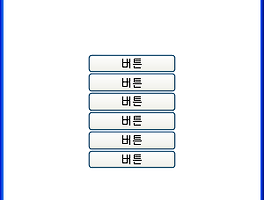
App.xaml 페이지에서 폼 작업 순서를 변경할수 있다.-StartupUri
WPF(기술,환경)
- Windows Presentation Foundation
- 윈폼 다음 버전
- 아직은 0.2~0.3.. WPF 메인으로 사용.. 부족
- 수업 : 애니메이션 사용(용도)
- 윈폼(주) + WPF(부) = 어플리케이션
- WPF 구현 = XAML(디자인) + C#(비즈니스코드)
- WPF/Every
- XAML(언어) : 디자인, 애니메이션, 이벤트
- C#(언어) : 비즈니스코드
- WPF/Everywhere -> 진화 -> Silverlight
XAML
- Extensible Application Markup Language
- 확장가능한 응용프로그램 마크업언어-
선언적 프로그래밍 방식(********)
- WPF 기술을 구현하는 언어
- 가독성
- 재물
- 화면구성이 가능하다. 최근 스마트폰에서
많이 사용하는 언어다.
WPF에서 컨트롤들이 자식 컨트롤을 가질때..
-<Window>태그 :
<Button>태그, 1(0), 2(X)
1. 자식을 단 1개만 가질 수 있는 컨트롤 : Content 속성
2. 자식을 1개 이상 가질 수 있는 컨트롤 : Items, Children, Dictionary 등 속성
Winform -> WPF
- 100% X
- Winform의 일부기능 + WPF의 독자적인 기능 : WPF
Label 텍스트 출력을 위해 많이 이용하는 컨트롤이다.
TextBlock 텍스트를(크기,글자체등) 조정할수 있는 컨트롤
Grid 도 패널중의 하나이다.
패널(Panel) : 다중 자식을 갖는
컨테이너 컨트롤(상자)
자기 자신은 화면에 표현 하지 않는다.
레이아웃 구성이 목적!!!(화면에 컨트롤
배치)
StackPanel, WrapPanel, Grid,
UniformGrid, DockPanel, Canvas
StackPanel : 자식을 일렬로 배치
StackPanel
overflow 시에는 화면상에서 보이지 않는다.
Orientation 속성 : 가로, 세로 정렬 위치 속성
HorizontalAlignment
속성 : 정렬 속성
WPF의 컨트롤 : 수평, 수직정렬의 값이 Strech값 기본(부모크기만큼 늘려라!!)
기본적으로 컨트롤들은 Strech값으로
지정 되어 있다.
WrapPanel:자동 개행이 된다. 윈도우 사이즈만큼
행이 조절된다.
이판넬도 윈도우 창사이즈가 맞지않을때 버튼이 짤려서 보이는 문제점이있다.
ScrollViewer : 윈도우 화면이 넘어가게 되면 자동으로 스크롤바가 생긴다. 이컨트롤은 안에 판넬속성을 부여해야 한다.
Canvas : 좌표를 지정해서 자식을 배치 : 애니메이션
적용시 활용, 애니메이션 효과를 사용할때 많이 사용한다.
Canvas.left,top,right
: x, y축을 조절 할수 있다.
<Grid>: 활용도가 높고 권장도가 높은 컨트롤, 모눈종이/표 같은 형태, 1행 1셀
형태이다.
<Grid.RowDefinitions>: 몇행을 사용할것이냐
<RowDefinition /> 갯수로 몇행을 사용할것인지 선언한다.
<Grid.ColumnDefinitions>
<ColumnDefinition /> 갯수로 몇 열을 사용할것인지 선언한다.
<Grid ShowGridLines="true">: 보이는패널 true로 설정시 가로 세로
줄을 보여라로 설정된다.
<Button Content="A" Grid.Row="0" Grid.Column="1"></Button> 이러한형태로 몇 행 몇열로 사용할지 지정해야한다.
<UniformGrid>: 자기의 자식갯수에 따라 행렬을 자기가 n/1로
나눠준다. Grid의 단순한 버젼 행 열 자동지정
<UniformGrid Rows="2">: 최소한 열의 갯수와 행의 갯수를 지정 할수 있다.
<DockPanel.xaml>: 한쪽으로 컨트롤을 채워 넣는 방식
<Button Content="A" DockPanel.Dock="Top,left,right" Height="50"/> : 남은공간을 다채워 주기 때문에 창의 크기도 달라져도 나머지 창을 채워 준다.
Window
<Window x:Class="WPFEx.Test"
xmlns="http://schemas.microsoft.com/winfx/2006/xaml/presentation"
xmlns:x="http://schemas.microsoft.com/winfx/2006/xaml"
Title="하이 XAML" Height="200" Width="400">
<Button Content="우와!!재물이다!" Height="100" Name="button1" Width="100" Click="button1_Click">
</Button>
</Window>
<!--
윈폼 : 비트맵 방식(눈에 보이는 크기만큼만 보인다.)
재물 : 벡터 방식 으로 만든 이유(핸드폰, PDA, PC, TV : 이미지 품질이 그대로 이전된다)
Window 태그의 안쪽에 Button를 기재 => Windows 컨트롤의 자식 컨트롤로서 Button 컨트롤을
추가
WPF : WPF의 단위(수치) = 96분의 1인치 이다. 픽셀
단위가 아니다.
Button, Window : Tag, Object Element
Content, Width, Height : Attribute(속성)
Content : Content Attribute
Click : Event(Attribute)
-->
XAML
<Window x:Class="WPFEx.Test01"
xmlns="http://schemas.microsoft.com/winfx/2006/xaml/presentation"
xmlns:x="http://schemas.microsoft.com/winfx/2006/xaml"
Title="Test01" Height="300" Width="300" Name="window1"
>
<!--<Button Content="버튼"></Button>-->
<!--<Button>버튼</Button>-->
<!--Simple Type vs Complex Type-->
<!--<Button>
<Button.Content>
버튼
</Button.Content>
</Button>-->
<!--<Button Content="버튼"
Width="100"></Button>-->
<!--<Button Content="버튼">
<Button.Width>
100
</Button.Width>
</Button>-->
<!-- <Button.Content> : 속성 엘리먼트 -->
<!--<Button>
<Button.Content>버튼</Button.Content>
<Button.Width>100</Button.Width>
</Button>-->
<!--
** WPF의 특징
: WPF는 모든 컨트롤이 모든 컨트롤의 자식이 될 수 있음!!
Content 속성
: 현재 엘리먼트의 자식 (컨트롤)
-->
<!--<Window.Content>
<Button>
<Button.Content>
버튼
</Button.Content>
</Button>
</Window.Content>-->
<!--<Button Content="버튼"
Width="100" Height="100"
Background="Yellow"></Button>-->
<!--<Button Content="버튼"
Width="100" Height="100">
<Button.Background>
<SolidColorBrush
Color="Yellow" />
</Button.Background>
</Button>-->
<Window.Content>
<Button Content="버튼" Width="100" Height="100">
<Button.Background>
<SolidColorBrush>
<SolidColorBrush.Color>
<Color R="255" G="255" B="0" A="255"
/>
</SolidColorBrush.Color>
</SolidColorBrush>
</Button.Background>
</Button>
</Window.Content>
</Window>
<!--
<Button Content="버튼"></Button>
: Simple Type
원형 :
<Button><Button.Content>버튼</Button.Content><Button>
: Complex Type
단순한 타입, 복잡한 타입
다양한 표현법이 존재한다.
<Button.Content> : 자기가 가지고 있는 속성의 엘리먼트라고 불른다.
**WPF의 특징 : WPF는 모든 컨트롤이 모든
컨트롤의 자식이 될수 있음
Content 속성 : 현재 엘리먼트의 자식
윈도우 > 버튼 > 버튼.콘텐트 형태로 계속 이어진다.
최종 형태 : 생략되어 표현 할수 있다.
<Window.Content>
<Button>
<Button.Content>
버튼
</Button.Content>
</Button>
</Window.Content>
Content="버튼" : String
Width="100" : 숫자 형태는 모두 Double 형태이다.
원형을 알고 있어야 하는 이유 : C#소스에서
원형을 알고 있어야 원하는 클래스에 접근하여 인스턴스를 생성하여 사용하기 위해서이다.
-->
using System.Collections.Generic;
using System.Linq;
using System.Text;
using System.Windows;
using System.Windows.Controls;
using System.Windows.Data;
using System.Windows.Documents;
using System.Windows.Input;
using System.Windows.Media;
using System.Windows.Media.Imaging;
using System.Windows.Shapes;
namespace WPFEx
{
/// <summary>
///
Test01.xaml에 대한 상호 작용 논리
/// </summary>
public partial class Test01 : Window
{
public Test01()
{
InitializeComponent();
}
private void window1_Loaded(object
sender, RoutedEventArgs e)
{
//컨트롤을 생성하는 방법
//1. XAML로 추가 : <Button>태그
사용
//2. C#으로 추가 : Button 클래스
//Button btn = new
Button();
//btn.Width = 100;
//btn.Height = 100;
//윈도우 표현 : window1, this.
Controls
//window1.Content =
btn;
}
}
}
Alignment


<Ellipse Stroke="Red" StrokeThickness="10" Fill="Yellow" MouseDown="Ellipse_MouseDown"></Ellipse>
<Window x:Class="WPFEx.Shape01"
xmlns="http://schemas.microsoft.com/winfx/2006/xaml/presentation"
xmlns:x="http://schemas.microsoft.com/winfx/2006/xaml"
Title="Shape01" Height="500" Width="500">
<Ellipse Stroke="Red" StrokeThickness="10" Width="300" Height="300" Fill="Yellow" MouseDown="Ellipse_MouseDown"></Ellipse>
</Window>
<!--
WPF의 도형
: GDI+의 그리기가 버전업
: 윈폼 + GDI + = WPF
-->
CS
using System;
using System.Collections.Generic;
using System.Linq;
using System.Text;
using System.Windows;
using System.Windows.Controls;
using System.Windows.Data;
using System.Windows.Documents;
using System.Windows.Input;
using System.Windows.Media;
using System.Windows.Media.Imaging;
using System.Windows.Shapes;
namespace WPFEx
{
/// <summary>
///
Shape01.xaml에 대한 상호 작용 논리
/// </summary>
public partial class Shape01 : Window
{
public Shape01()
{
InitializeComponent();
}
private void Ellipse_MouseDown(object
sender, MouseButtonEventArgs e)
{
//이벤트 발생 주체 -> sender(윈폼)
//이벤트 발생 주체 -> sender(WPF)
//sender == Ellipse 객체 (O, X)
//e.OriginalSource
Ellipse
ellipse = (Ellipse)e.Source;
ellipse.Fill = new
SolidColorBrush(Colors.Blue);
}
}
}
Alignment

XAML
<Window x:Class="WPFEx.Alignment"
xmlns="http://schemas.microsoft.com/winfx/2006/xaml/presentation"
xmlns:x="http://schemas.microsoft.com/winfx/2006/xaml"
Title="Alignment" Height="300" Width="300" HorizontalContentAlignment="Left" VerticalContentAlignment="Top">
<StackPanel HorizontalAlignment="Left" VerticalAlignment="Top">
<Button Content="버튼" Width="100" Height="100"></Button>
<!--<Button Content="버튼"
HorizontalAlignment="Center"
VerticalAlignment="Center"></Button>-->
</StackPanel>
</Window>
<!--
컨트롤 배치(정렬)
1. Width : 너비
2. Height : 높이
3. HorizontalAlignment : 부모 영역에서의 본인 수평정렬(본인)
4. VerticalAlignment : 부모 영역에서의 본인 수직정렬(본인)
5. HorizontalContentAlignment : 내용물의 수평정렬(부모)
6. VerticalContentAlignment : 내용물의 수직정렬(부모)
모든 컨트롤들은 기본적으로 : Strech로
정렬 되어 있다.
-->


